Wednesday, July 30, 2008

Ever so humble, happy camper!

photo source: Flikr.com
You are very nice people. Warm of heart, complimentary, encouraging...Last I checked, the comments for my playhouse post had reached the nineties. The nineties!! I don't think I have ever reached such a "comment high", and I doubt I ever will again!! I have to admit, I think I have the nicest blog readers/friends ever!! Thank you so much for your kind words, and I am seriously considering a playhouse addition to house those of you who wanted to move in. Only, you know I will put you to work...babysitting, mowing, cooking...so you may want to rethink that notion!
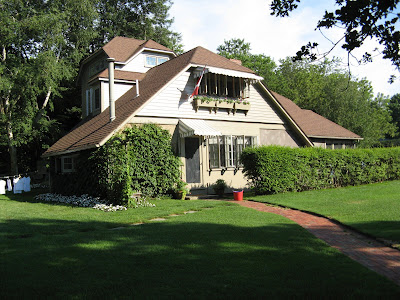
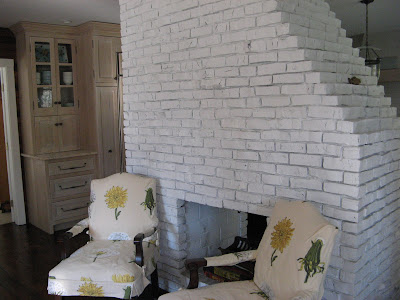
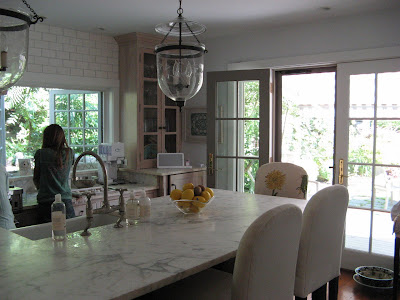
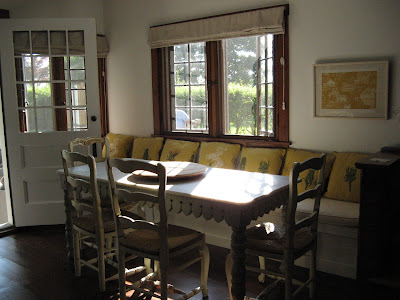
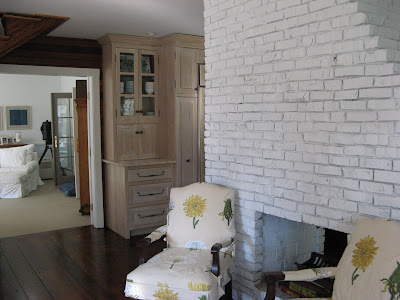
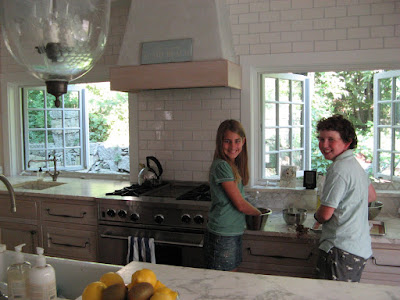
In other good news, I am finally embarking on a camping trip, and my lonely camper has been getting a bit of a makeover. Last year, I added new cabinet hardware, a new "tin" panel to disguise the mini-fridge, and made a few purchases designed to make our little camper prettier. This year has been all about the slipcovers. Just for fun, my husband, daughter and I had a look through the new campers on display at our local Walmart's parking lot. I saw some purdy ones - ones with white cabinets, stainless steel appliances - but they all shared one ugly secret: they all housed sofas and cushions upholstered in the most monstrous of fabrics. This is most definitely the before photo of my camper's cushions!

Who makes the design choices for these things?? I figure it is a portly, balding man puffing on a cigar, with his polyester pants creeping below where no one woman wants to see, belching after eating a cheese dog or two, and pointing at some upholstery catalogue from 1978, exclaiming, "That one will do...just bee-yoo-tee-ful!!" At least I hope that is who is responsible...

Anyhoo, I have enlisted a friend, who just happens to be the most fantastic seamstress, to make me some new seat cushion slipcovers. True to my nature, I used fabric that was inexpensive, at hand locally, and will spruce things up on a budget. No sense upsetting my innocent husband with trivial matters. I have also ripped down the ugly valances that come with the camper and left things bare. Better nothing, than making do with ugly...
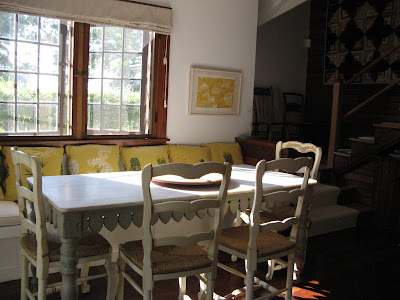
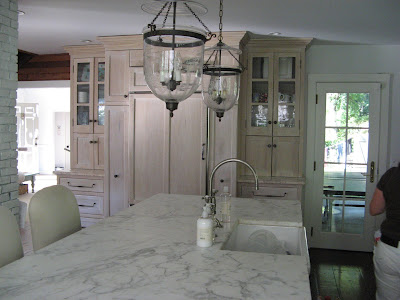
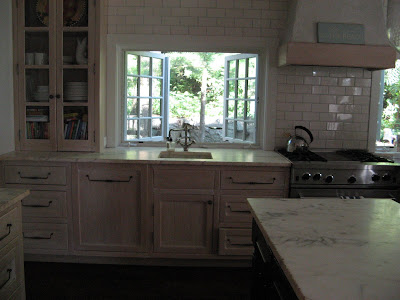
photo: Country Home
I'll show you the photos after I get back, and perhaps it will inspire those of you wrestling with the idea of making slipcovers for the ugly ducklings in your life! I'm off to pre-cook bacon, make a grocery list, and stock the food I already have, into the cupboards of the camper.
Here is my meal plan for those of you considering a camping trip of your own:

First night/day of arrival: (supper):

Pork chops (previously frozen to remain safe to eat!)
bagged salad (croutons added later)
pasta salad (kept well-chilled)
rolls
Day 2:
Breakfast: bacon (pre-cooked at home)
hash browns
maple beans (canned)
eggs

Lunch: hamburgers
potato chips
fresh fruit...
(for those who will actually bother to eat it!)
Supper: chicken and vegetable skewers:
(pre-chopped, frosen chicken breast meat, thawing in fridge), canned baby potatoes, mushrooms, red and green peppers, large chunks of Vidalia onions).
-packaged flavoured rice
-french bread (Dempster's, baked in our tiny toaster oven)

Day 3: Breakfast:
pancakes (boxed mix, just add water/milk)
Maple Leaf pre-cooked sausages

Lunch: hotdogs (we're camping, remember?).
Supper: hot and spicy pasta dish (veggies pre-chopped, chicken pre-cooked, left-over pork chop, sauce pre-mixed, just have to cook fettucini noodles).

Final day: Breakfast: cereal, muffins (baked at home, and frozen), toast

**Our meals may or may not sound a bit extravagant to some campers, but I like to prepare ahead so we can have relatively healthy, tasty meals. I figure enough chips, pop, and s'mores are eaten around the campfire, and I cannot overdo the hotdog thing...~~shudder~~...!!!

photo source: Flikr.com

photo: source unknown

*****************************************************************************

To my complete and utter amazement, the Washington Post online just selected my post about Sophie's little playhouse as their Blog Watch pick of the week!! Thank you Terri Sapienza!!

Tuesday, July 29, 2008

Visiting The Asher's Summer Cottage

Once in while you enter someone's home and you feel like you have been there before. So warm and inviting, you immediately feel relaxed and comfortable and think "Yes, I am finally home!" Many summers ago I was fortunate enough to meet some new friends from Canada who summer with us. They invited my family to a party at their home to celebrate Canada Day. That's when I first came upon The Asher's Summer Cottage. So sweet and perfectly nestled into its setting it took my breath my away. Sadly, the party was outdoors (as I was secretly dying to get in) but my new friend and I shared a love of decor and she graciously left her guests to give me a tour. She has again graciously let me inside her home so that I might share it with you.


You arrive via a wonderful antique brick pathway. Today I will share with you the family room and the kitchen. Please bear with my novice efforts at photography. The house is far more beautiful than my amateur photos can capture.


The kitchen is a lovely room flooded with sunshine. Casement windows and wide oak floors add to the cottage charm. Notice the marble topped antique bakers table, the custom built in banquette and floral embroidered pillows.


Opposite the dining table used to be a wall which closed in the spaces. They opened up the wall an repaired the two sided fireplace using antique bricks, which they washed in white. I love the slipcovered chairs and teal antique pantry cupboard.


The kitchen has such lovely aged surfaces. Custom cabinets are glazed and finished to resemble aged driftwood or wood bleached by the sun. All counters are covered with antique carrara marble. Edges are chipped and worn and the marble has a lovely patina. The center island cupboards are painted and distressed black and topped with a huge marble slab. Because antique carrara marble of this size is nearly impossible to come by, they were able to find a piece that was tea stained and aged to match the perimeter antique counters.


Here are close ups of the cabinet glaze and the antiqued aged marble.


The kitchen from the opposite side. Beautiful French Doors lead out to an antique brick patio.


Notice the lower baking counter to the right of the stove. A perfect baking area for our children, who were making cookies to sell at the Village Fair Bake Sale. Isn't this what kitchens are for?


Spectacular casement windows open to lovely gardens beyond.


The family room is filled with slipcovered sofas , painted tables and antique pine. An accent wall in painted a pale, robin's egg blue. This adds to the tranquil feeling in this space. A wall of french doors opens to a screened porch. Handmade pillows are fish prints done each year at the Fair by her son. Framed antique boat blueprints, linen roman shades and sisal rug complete the look.


A warm and wonderful space for a warm and wonderful family. Thank you for letting us take a peek inside!

Sunday, July 27, 2008

A pretty, little playhouse!!


It's time for the big unveiling...


It is as complete as it will ever be, and I have to admit I/we are as happy as can be with how it turned out! As I have mentioned before, I have wanted this for our daughter long before she even came along! To me, a playhouse is the quintessential little girl's dream, as it was for me as a child. Since I didn't have one, I always vowed our daughter would someday...


Rather than go on and on about how happy she is with it (she's thrilled to bits!), and how I finally feel like I can relax and just watch her play with her little friends in it, I will simply give you "the tour". I hope my pathetic excuse for a camera will do it justice...

I decided to play it safe, and paint the playhouse yellow to blend in with our home. I flip-flopped between painting it pale pink or a soft, fresh green, but my reserved side kicked in, and yellow it is (that's not to say I won't change my mind and repaint it next year!). I used Flik and Company Blue on the door, and I am so happy with that. We used a locking doorknob, and she loves using her very own key to unlock it each morning! House numbers were hung above the door (her daddy made the door, too), and the old mailbox and door knocker I had kicking around. I purchased the outdoor "lights" at The Christmas Tree Shop, and no, we didn't run electricity to it.
This is what you see when you open the door: My husband built a day bed, and I used a second-hand crib mattress for it. I bought the bedding (crib sheet and small quilt) at TJ MAXX, when I visited Bangor in the spring. I got the body pillow at Walmart, and the pink pillows at Homesense. I picked up the vintage-looking bird cage and glittery GIGGLE sign there as well, and the little mats were 1.99 at Marden's.

My husband was about to finish boarding in the eaves, when I decided that it would be so nice for her to be able to lie on the bed and look up at the trees (and stars). So, he made a plexi-glass window of sorts, and it is one of my favourite things about the little house. This is also a good view of the white-wash effect I decided on out of laziness (one-coat wonder!) and for the simple fact that I like it.

This angle shows her babies' beds and the only functioning window. It is a door insert, but works well to let fresh air into the house. The curtains are from the Shabby Chic collection at Target, and I hung them simply from a branch and some cup hooks.

Moving around the room, we find the "kitchen". This is undoubtedly my favourite thing about the playhouse! I had asked my husband to make a counter area of sorts that I could place her little stove on, and "sink a sink" into. I figured he'd just secure some wooden planks, and cut out the hole for the sink. Not my husband!! As I was painting, he took it upon himself to create the prettiest "butcher block" counter area I have ever seen! We used iron brackets to support it, and they look so nice. I had also told him I wanted the sink in the corner, and this is what he came up with:

The sink is a stainless steel bowl I got for a couple of dollars, and the tap is an old salvaged one I got from a used building supply store. I simply spray-painted it with chrome spray, and its grimy facade disappeared! The dish rack and dishes came from The Dollar Store, and she loves putting some water from the nearby outdoor tap in the sink and washing up her dishes. Of course, looking out her window makes the chore less dreary!

This is a close-up of her little, wooden stove. I got it at Homesense, and it was originally a dull, wooden finish. Sooo, out came the pink spray-paint, and voila! A few scrap-booking embellishments, and it is now as pretty as can be!

Across the room/house is the eating area:

Before you think I've gone mad, yes, that is hardwood flooring. Our kindly neighbours gave us their left-over flooring, and to be honest, it is nicer than what we have in our own home!
I bought this pink, iron table set at Homesense (are you getting that this is one of my favourite stores?). It is the perfect shade of delicate pink, and is just the right size for little ones to sit. I have, however, had to squeeze myself into one of the little chairs, and, I can assure you, they are not very comfortable! I definitely "eat" quickly when I am invited to a meal in the playhouse! Above the table is a shelf I had kicking around. I placed her "appliances" on it and the little drawers house her cutlery. A girl has to be organized!!

This is where she hangs her baby buggy. It is ready to go, whenever she has to "run some errands"!!

This is the area above the door. Sophie likes having a clock that is all hers, now that she knows how to tell time.

She also had to have a phone! My mum picked this phone up at a yard sale. It was previously white, so of course I had to paint it pink!! Thank goodness for spray-paint!

Every little playhouse needs a chandelier!

Now, I may find something with a little more pizazz, but for now, this outdoor chandelier I got from IKEA (about eight years ago) fits the bill. Again, I painted it pink, added a few crystals I had lying around, and hung it from the center of the eaves. It is a rather unassuming, little chandelier, but pretty enough... and basically FREE!!!

This is the interior view of the door. I simply hung a little chalkboard on it and she writes notes like, "No boys allowed". My youngest son likes to torment her at times and lock her out, pretending that he's "messing it up". She doesn't like it one bit. She is very territorial...

And so ends our little tour. I hope you enjoyed your visit!

Lighting in the Christopher Peacock Kitchen

Many of you have emailed me asking where to find some of the non cabinet elements of a Christopher Peacock Kitchen. Let's look at some of the lights that are so popular in the these kitchens:

House Beautiful photo


House Beautiful photo

MLS photo

You often see hanging shade pendant lights as in the photos above from House Beautiful and MLS. These lights are from Vaughan Lighting.

Vaughan Lighting


Vaughan Lighting


The top light is called the Menton Hanging Shade the bottom and the Nickel Hanging Shade from Vaughan lighting. Both are only available to the trade.


Shades of Light


The Kensington Pendant is a wonderful copy available from Shades of Light. A bargain at only $279.


MLS Photo

Studio Pedrazzi Architects and Design


MLS Photo


Here are more industrial lights. The top lights are most likely from Circa Lighting, the bottom ones may be vintage.


Circa Lighting

Circa Lighting


These two lights, top, Country Industrial and bottom, Yoke Pendant, are both from Circa Lighting.


Restoration Hardware


The Benson and Harmon Pendants are more affordable options available from Restoration Hardware.


Here are some School House Pendants. These are very easy to find from both the higher end lighting manufacturers or the more affordable manufacturers.


Restoration Hardware


Shades of Light


The first is from Restoration Hardware, the second from Shades of Light , both very affordable and classic in styling.


Making a subtle change in your own kitchen by adding classically styled pendant lights is just one way you can get a step to closer to one of America's most copied kitchens.

 
coompax-digital magazine